This section will guide you through the process of loading the Wifinity locally to your PC.
If you want to load Wifinity to your infrastructure/network or to the cloud, remember to set before the IP address to your Wifinity based on your infrastructure or cloud subnet/network. To perform this, run the Wifinity platform locally into your Hypervisor following the “Deploying your Wifinity” section at page 11. Then follow the “7 – Running the Wifinity Wizard” or “8 – Assigning the Wifinity IP Address without Wizard” chapter to change your Wifinity IP address.
First, you need to install a compatible Hypervisor (Type 1 or 2) (https://en.wikipedia.org/wiki/Open_Virtualization_Format#Industry_support) on your PC.
This task section allows you to test the Wifinity platform locally before deploying it on your infrastructure/network or on the cloud. We recommend for the testing environment to use the following providers:
You need to run the downloaded file and follow the provider’s instructions to install it.
Once you have downloaded your Hypervisor, you need to download your Wifinity.
Open a web browser and go to the link we have emailed you.
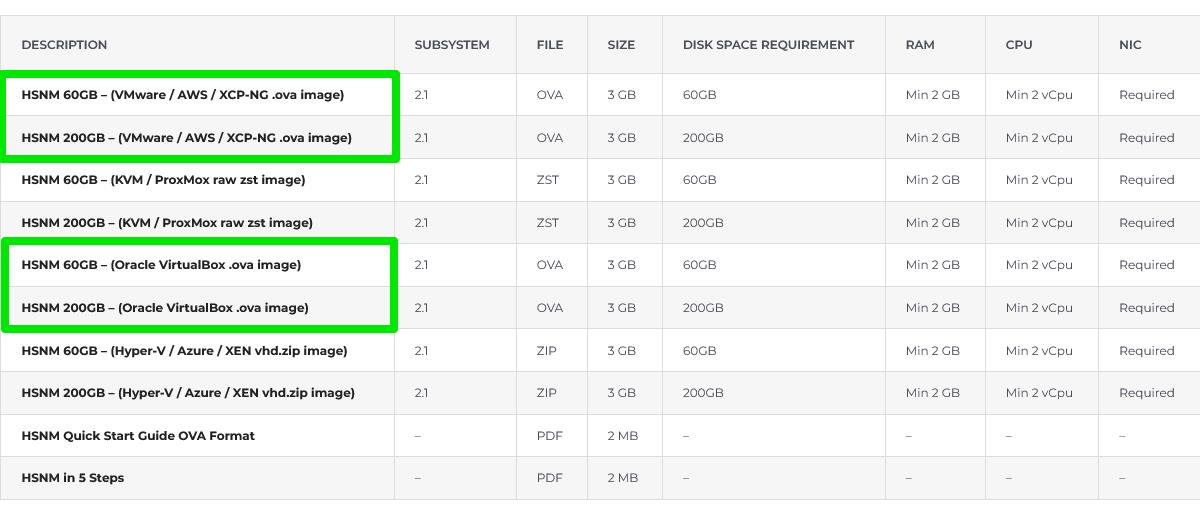
Select the VM based on the Hypervisor you have previously chosen:
Connect the PC to a network using an ethernet cable
Warning Do not connect your PC to the WiFi, but only through ethernet.
Warning In some cases, your Hypervisor does not enable a virtual machine ethernet interface unless the host ethernet cable is connected.rnrn
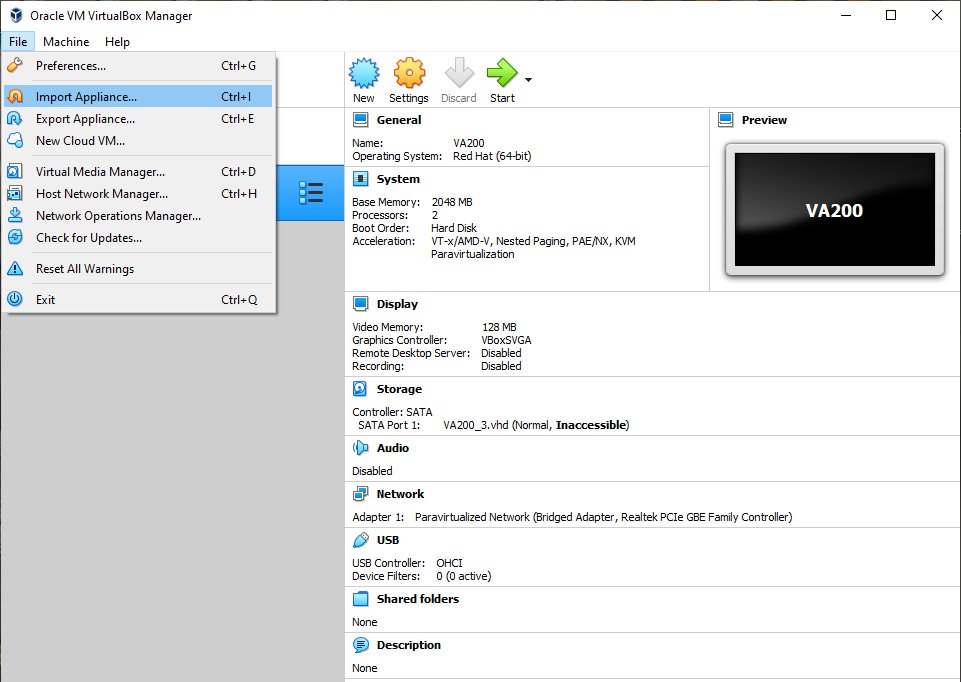
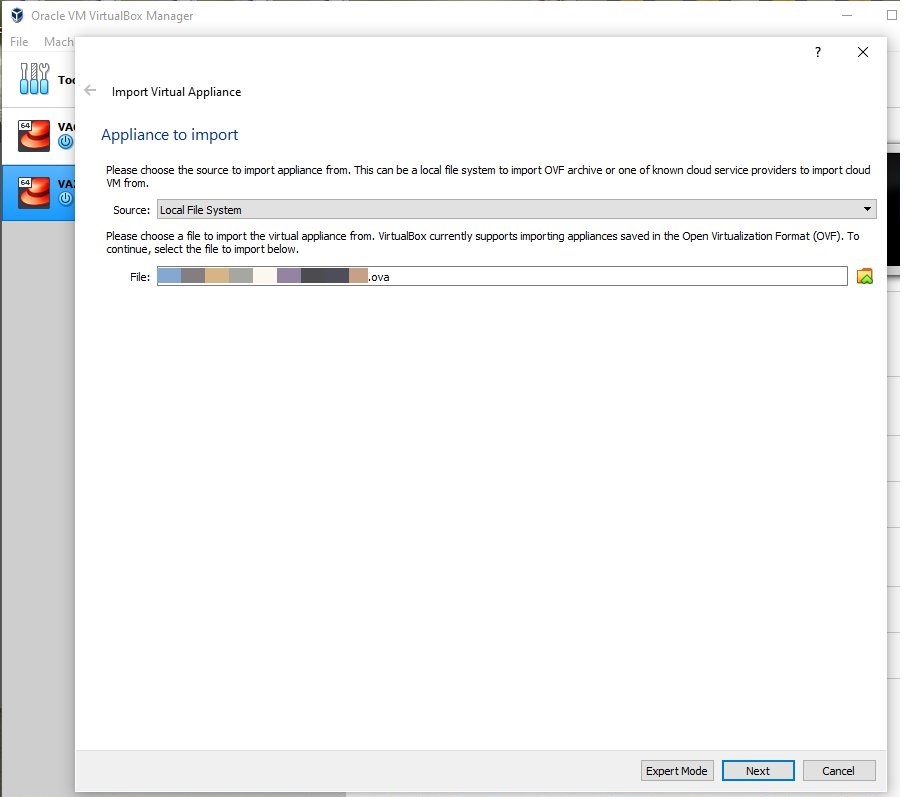
Open your Hypervisor installed before and then import the OVA file:
Follow the instructions below whether you have VMWare or VirtualBox as follows:
| VMWARE | VIRTUALBOX |
 |
 |
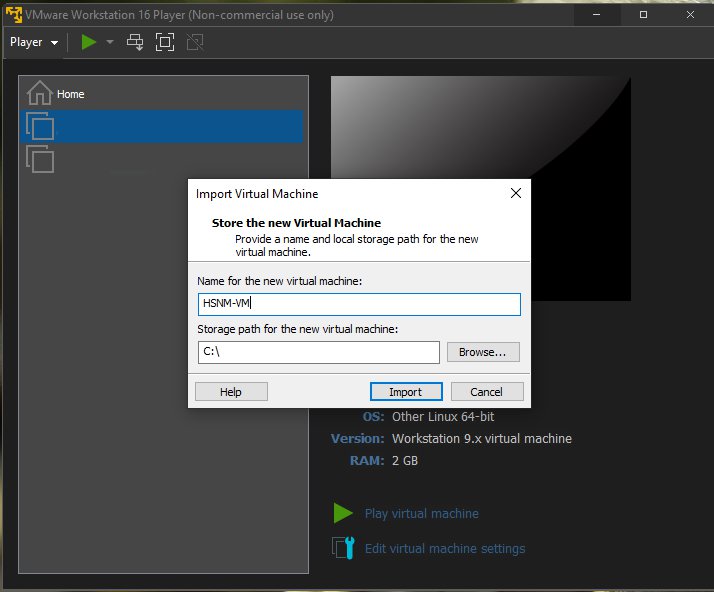
Then choose your VM name and the path where to save it, click on Import, then wait for the import process ends:
| VMWARE | VIRTUALBOX |
 |
 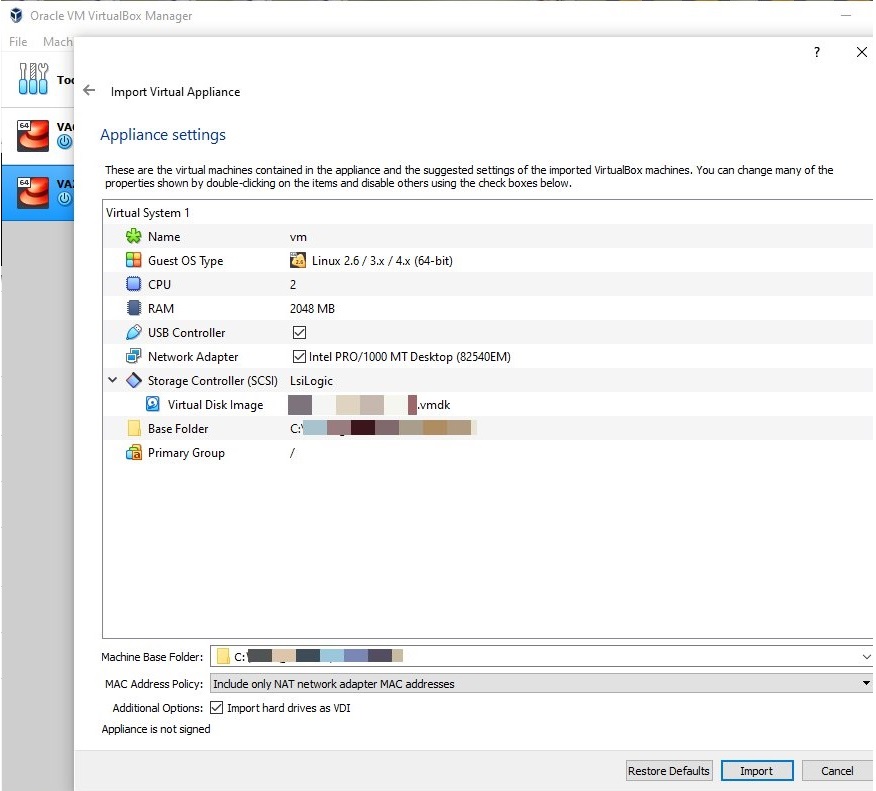 |
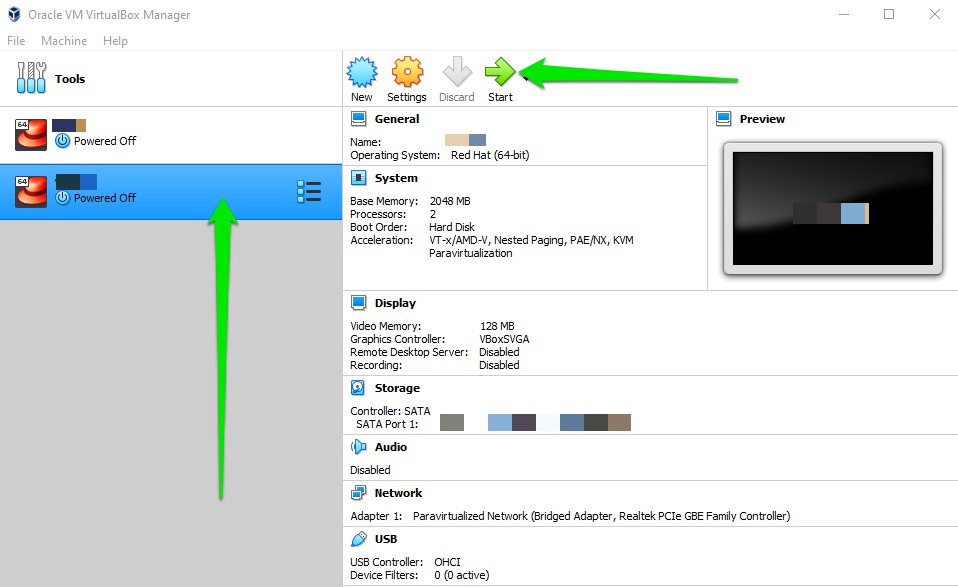
Once you have completed the importing process, click the Play virtual machine or the Start button to power your Wifinity.
| VMWARE | VMWARE |
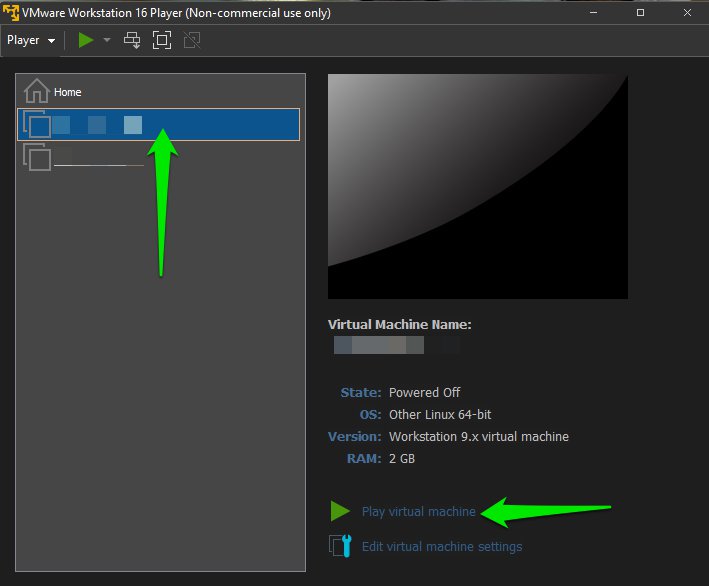 |
|
Then you need to wait for the Boot process. Once the process has been completed, the following message will appear on the console:
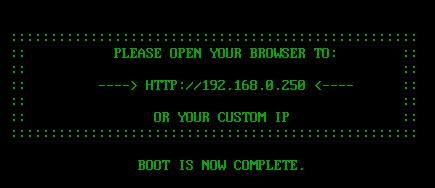
In case your PC doesn’t have an IP address of 192.168.0.0/24 subnet, please set it (for example, set 192.168.0.200/24)
Warning Do NOT set up the IP address 192.168.0.250 on the PC used to configure your Wifinity, because this is the default Wifinity IP address.rnrn
Warning Make sure that your PC can reach the default Wifinity network subnet 192.168.0.0/24rnrn
Now you need to log into your Wifinity to configure it based on your needs.
Open a web browser from the PC and enter http://192.168.0.250 in the address bar
The login form will appear, and you are prompted to digit your login details

Enter the default “admin” as username and “0000” for password.
Then press Enter or click the Login button.
Now the WifinitySystem Wizard will appear:
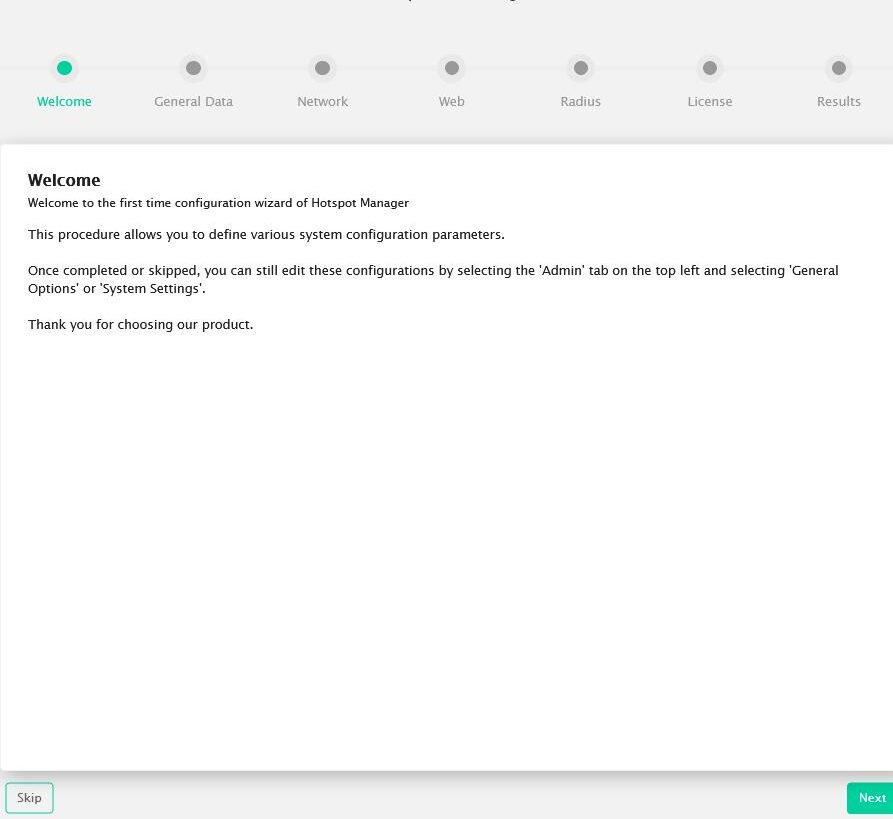
Follow the wizard to set up the initial Wifinity configurations like the IP Address, radius secret, Company name, etc.
Once the configuration wizard is completed, you will not be displayed it again the next time you log in.
Suppose you want to load your Wifinity to your infrastructure/network or to the cloud, and you need to change the Wifinity IP address, but the configuration wizard is not shown. In that case, you can make it appear by following the steps described in the ‘’8 – Assigning the Wifinity IP Address without Wizard” chapter.
First, you need to open a web browser from the PC, then enter http://192.168.0.250 in the address bar.
Log in to the Wifinity using “admin” as username and “0000” for password.
Once logged in, click the Admin tab and select “System Settings“.
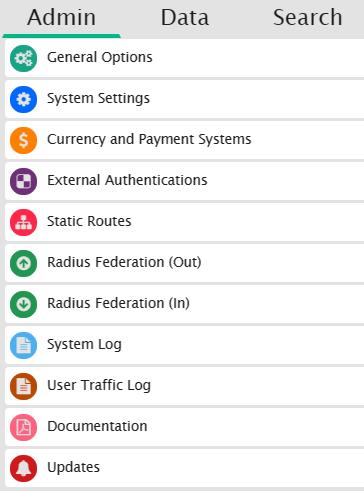
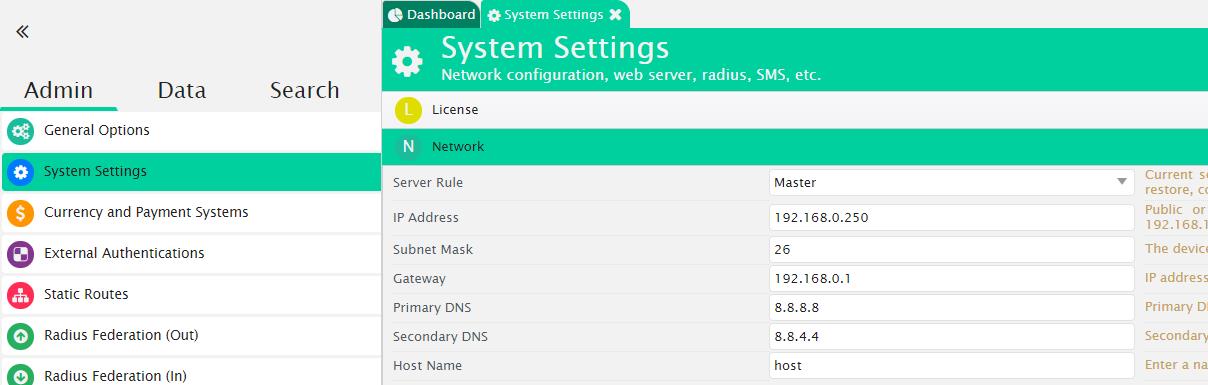
And complete the following tasks:
Into the IP Address field, enter the IP address that you want to assign to your Wifinity in order to connect it to your infrastructure/network (e.g. 10.0.0.200);
Into the Subnet Mask field, enter the network mask in CIDR format (eg.: 24);
Into the Gateway field, enter your network gateway (e.g. 10.0.0.1);
Into the Primary DNS and Secondary DNS fields, enter valid DNSs (e.g.: 8.8.8.8);
Host Name field, enter the name for your platform (e.g.: Wifinity1).
Now on the upper right corner in the command bar, click the Save button and then the Restart Services button to assign the new IP address to your Wifinity.
You can now log in to your Wifinity web administration by using the new IP address you have set up.